Carbon fixtures use a custom track to capture and record a fixture’s state as keyframes in the Sequencer. Carbon’s fixture tracks are compatible with all Sequencer tools and features.
(NOTE: Carbon fixtures do not currently offer granular keyframe control of individual fixture parameters. To control a fixture for recording a user must still use a DMX source such as Art-Net. The track only captures the fixture’s current state.)
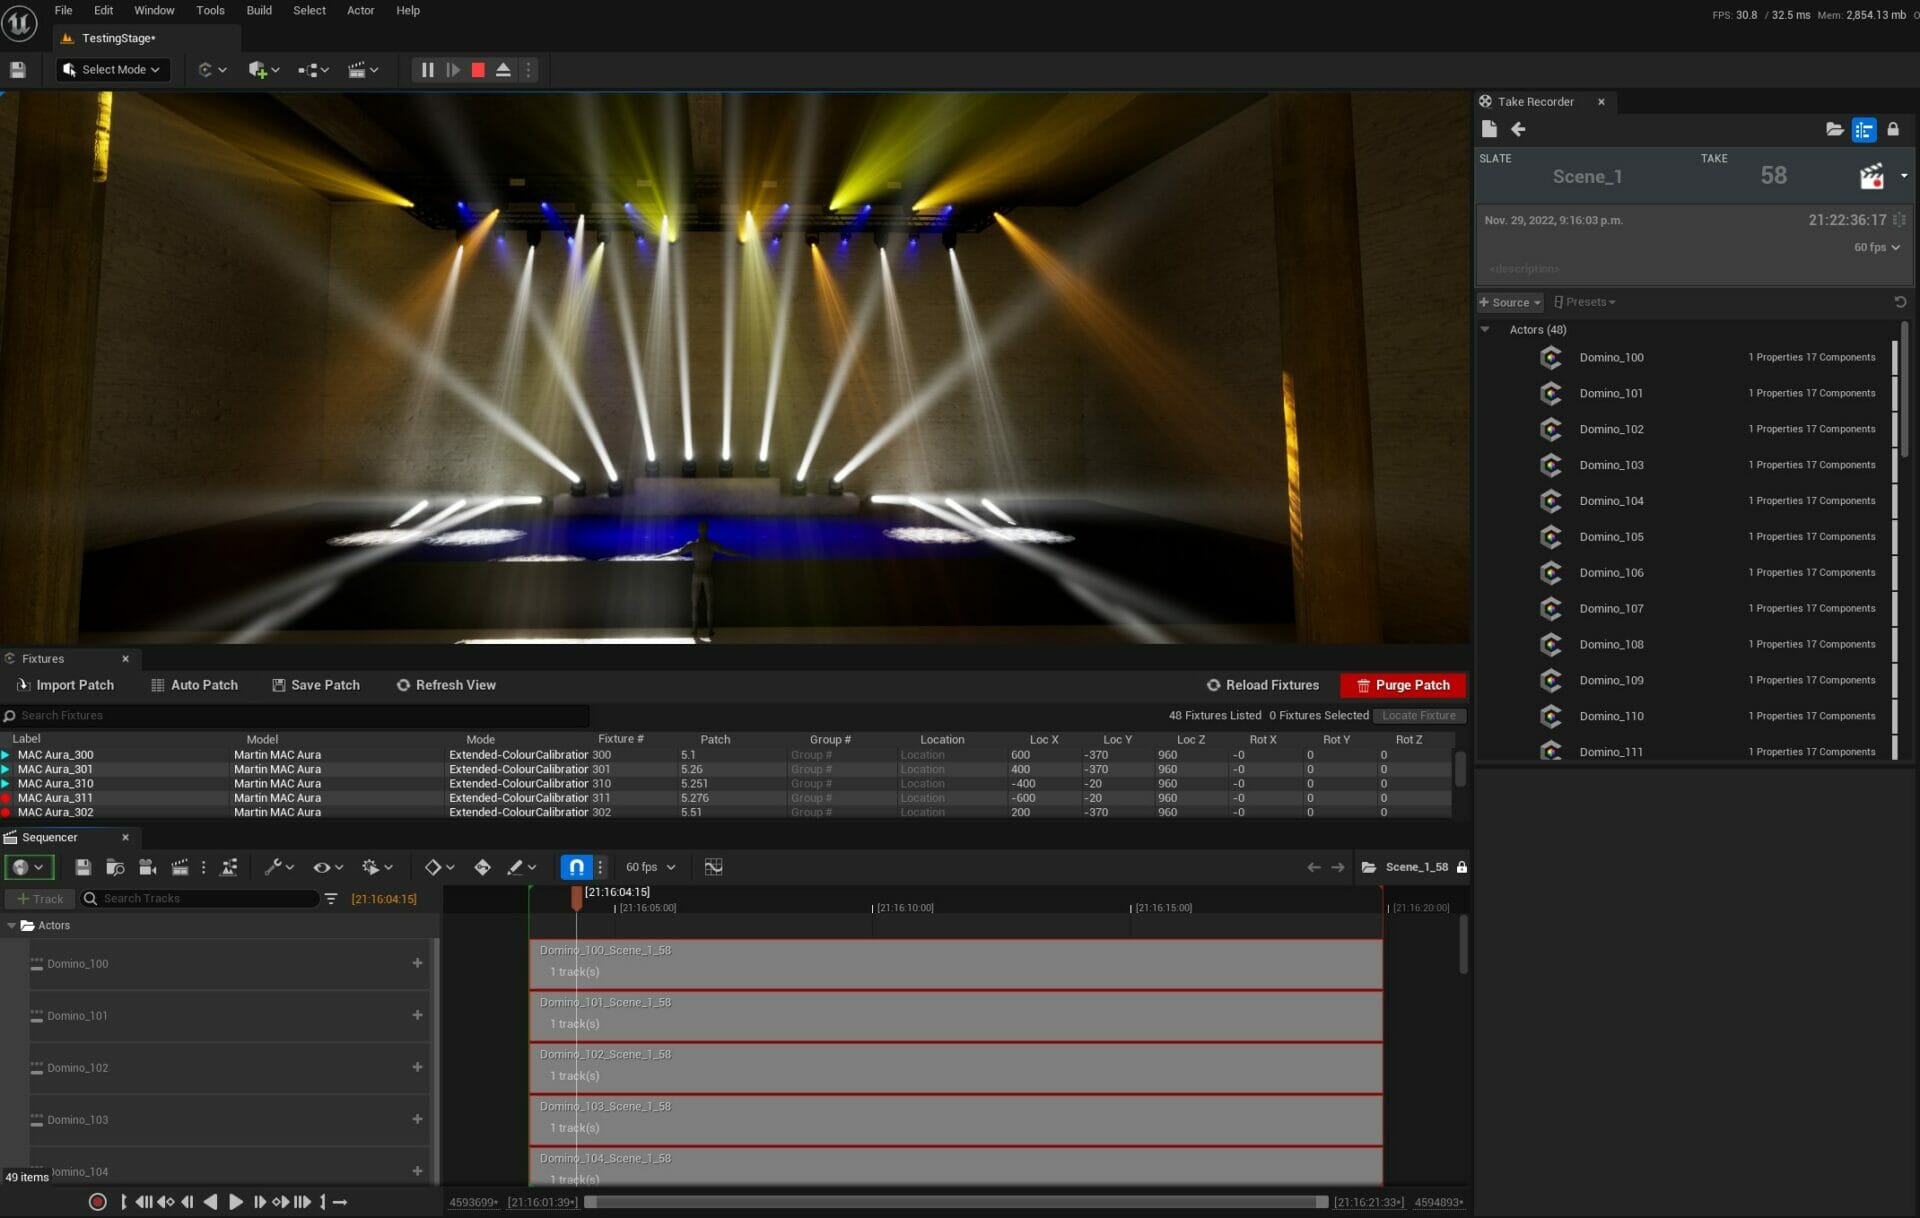
The UE5 Take Recorder is the recommended workflow for recording Carbon fixtures. Take Recorder is automatically enabled whenever Carbon is installed in a project.
UE5 Sequencer overview:
https://docs.unrealengine.com/en-US/Engine/Sequencer/Overview/index.html
Take Recorder overview:
https://docs.unrealengine.com/en-US/Engine/Sequencer/Workflow/TakeRecorder/UsingTR/index.html
Tips and tricks for getting a good recording:
- Specifying a minimum frame rate in Project Settings can cause severe time dilation in the recording, ensure that frame rates are unbounded when recording.
- Changing the Sequencer clock source to another source besides Tick can help provide more frame accurate recordings.
- Recording accuracy is heavily dependent on CPU speed, reducing external CPU load as much as possible will improve quality of recordings.
- Recoding in multiple passes can help keep computation overhead within real-time parameters.
*Disclaimer – Using the DMX Recorder out of play mode is unstable in the current version of Carbon for Unreal. We recommend recording in play mode for the time being.
Two recommended workflows for recording Carbon fixtures:
For recording in real-time:
Using the Carbon GenericDMX Recording Tool (Recommended)
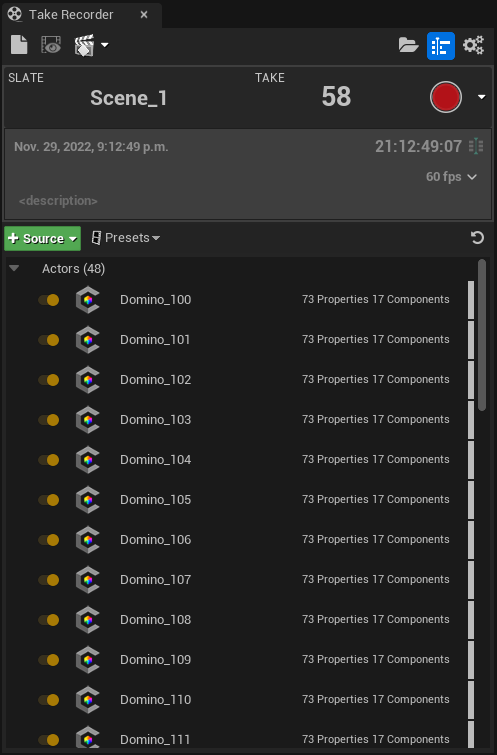
Carbon for Unreal version 1.1 and later includes the GenericDMX Recording tool which makes the process of selecting fixtures in the scene, arming for record, and playing back a take simple.
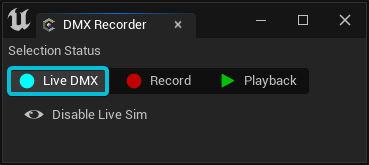
The tool can be opened by clicking “DMX Recorder” on the Carbon Tools tab of the Carbon Menu.
To record a take using the tool:
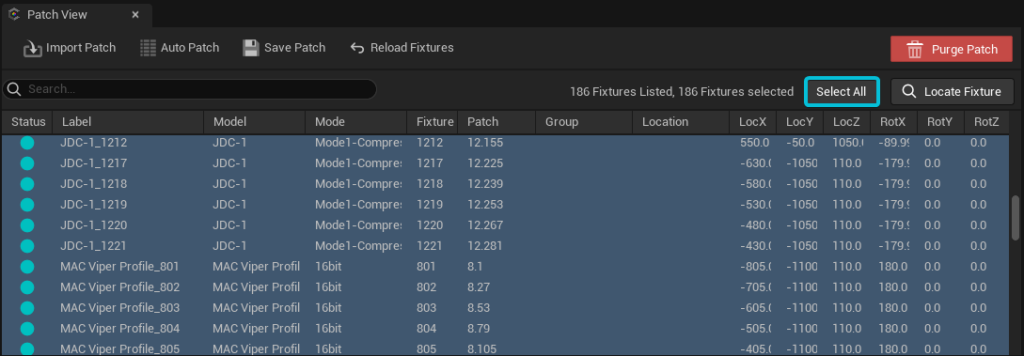
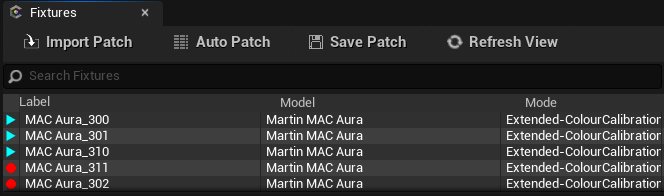
1. Select the fixtures either in the level outliner or by using the Patch View. TIP: Use the Select All button in the Patch View to select all fixtures in the scene.
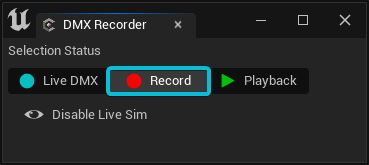
2. In the DMX Recorder tool, press “Record” to arm the selected fixtures for recording, automatically open the Take Recorder, and populate and configure the new take with the selected fixtures.
3. Press the play button in the top of the editor to go into a Play in Editor session, then press record on the Take Recorder window to begin recording your take.
NOTE: You must be in a play session in order for the take recorder to record properly. For no performance issues while recording, tick the “Disable Live Sim” button when arming for recording.
4. Drive your fixtures from your console.
5. Stop the recording.
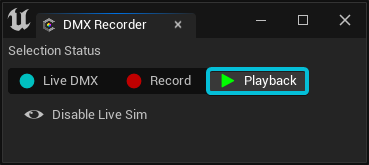
6. To drive the selected fixtures using the newly recorded sequence, make sure that all fixtures are selected. Then, click on “Playback” in the DMX Recorder tool.
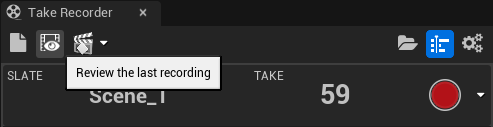
7. Open the recorded sequence by pressing the “Review the last recording” button in the Take Recorder. Go back into a Play-In-Editor session and hit play on your recorded sequence to review your recording.
8. Click “Live DMX” to disarm the fixtures and reset them to standard real-time DMX control.
TIP: Status of fixtures is shown in the Patch Panel.
Manual Take Recorder Workflow
The Take Recorder is a powerful tool that allows you to easily record the motion and properties of actors in a scene by simply dragging and dropping actors from the World Outliner into its panel.
The Take Recorder panel can be manually opened from: Window > Cinematics > Take Recorder.
We will cover a basic sample workflow for manually recording fixtures here, more advanced features of the Take Recorder can be learned from the UE5 official documentation.
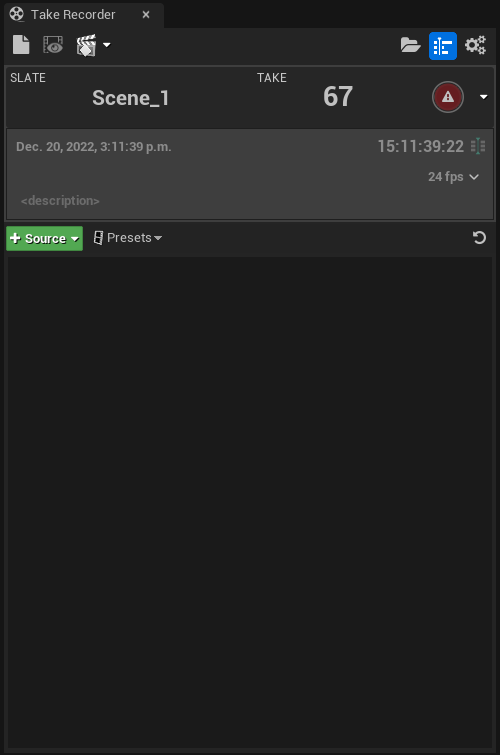
- To get started, open the Take Recorder and set your Slate label and Take number; as these will generate the filename of the recorded sequence.
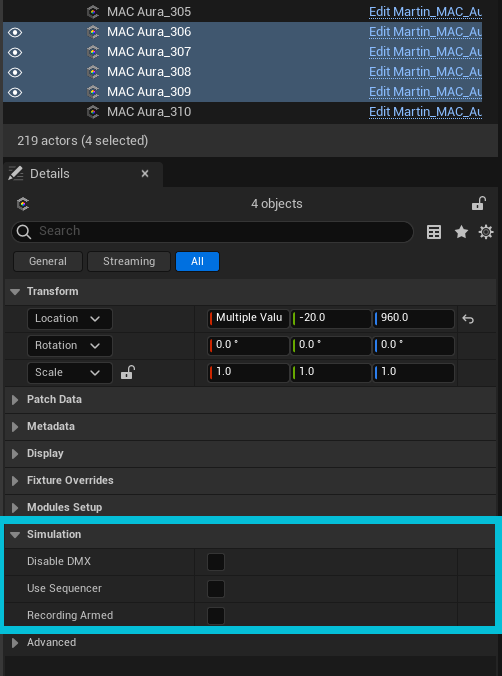
- Next, select the fixtures you wish to record and open the actor Details panel.
- Under the “Simulation” section check the box labeled “Enable for Recording,” and ensure that the “Use Sequencer” checkbox is unchecked, (this checkbox is for driving the fixtures from a previous recording only).
- Drag the fixtures prepared in step 3 from the World Outliner into the Take Recorder, drop them in the highlighted box with the dashed outline. (NOTE: Dragging fixtures from the Patch table in the CarbonCore panel is not supported). You may also add fixtures to the panel by using the “+ Source” dropdown in the panel, choosing “From Actor”, and locating the fixture you would like to record.
- Select all the newly added fixtures in the Take Recorder and in the properties panel that appears at the bottom of the Take Recorder ensure that “Record Type” is set to “Possessable.” (“Project Default” tends not to default to “Possessable” so it’s best to set this explicitly for all fixtures being recorded, or you will end up spawning duplicate fixtures and beams in the runtime.)
- For added efficiency expand the “Recorded Properties” tree and deselect all properties except “fixtureSerializedState” as it is the only property we need to record to ensure we capture all of the motion and effects of the fixture. All other properties are redundant and may add extra computational overhead during the recording process.
- Play the scene and verify that your DMX data is driving the scene properly.
- Click the red circle Record button on the top right of the Take Recorder to start the recording.
- Drive your fixtures using your DMX console as you normally would.
- When done, stop the recording with the same button on the top right of the Take Recorder (now a square “stop” button).
- The recording will be stored in the Content > Cinematics > Takes > [recording date] directory in the Content Browser. You can also open the Takes folder by clicking on the folder icon near the top right of the Take Recorder panel.
Playback Tips:
(REMINDER: To playback the sequence you should enable “Use Sequencer” in the details panel of the fixture under “Simulation” so fixtures are driven from UE5 Sequencer data and not live DMX data from Art-Net or other external connection)
- You can open a recorded sequence in the UE5 Sequencer from the Content Browser by double clicking it to view the recorded sequence and play it back.
- Playback controls are shown on the bottom left bar of the Sequencer panel.
- By default the Take Recorder captures all actors as separate sequences, and combines them together into a main sequence with each fixture on a different track. (The individual sequences containing the actual keyframes are stored in the “<slate_take #>_Subscenes” folder).
- For best performance, “Enable for Recording” should be deselected when not recording the fixture.
- Playback only works in runtime (play) mode. Playing back the sequence in edit mode will not control the fixtures.
Recording in Real-time
To record directly from the Unreal viewport, and save to disk in real-time, you can use the Off World Live Livestreaming Toolkit plugin. Follow these tutorials to learn more: