Selecting a fixture to Import
Carbon makes it easy to manually add new lights to a scene from a built-in library of fixtures. To access the library, open the Carbon Library panel from the Carbon Menu. The first section on the left is the Miller Column file tree, and is a visual representation of the library sorting system. This file tree will allow you to narrow library assets down to a specific filter set based on the options you select in the columns. The right side of the library window houses the resulting fixture assets that the library contains. Fixtures can also be found using the search bar at the top.
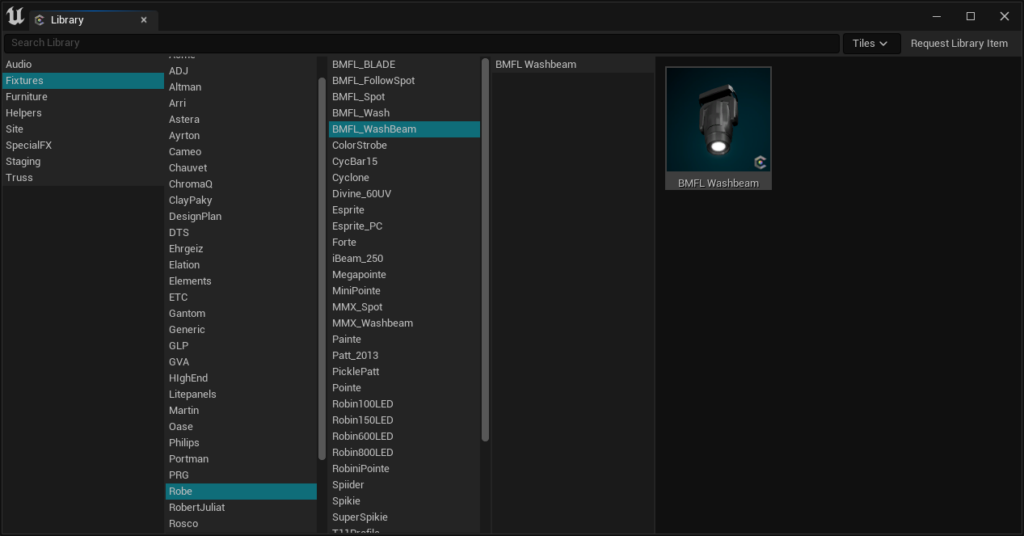
[The library panel shows a list of components (i.e. fixtures) you can manually add to your scene]
Placing Fixtures
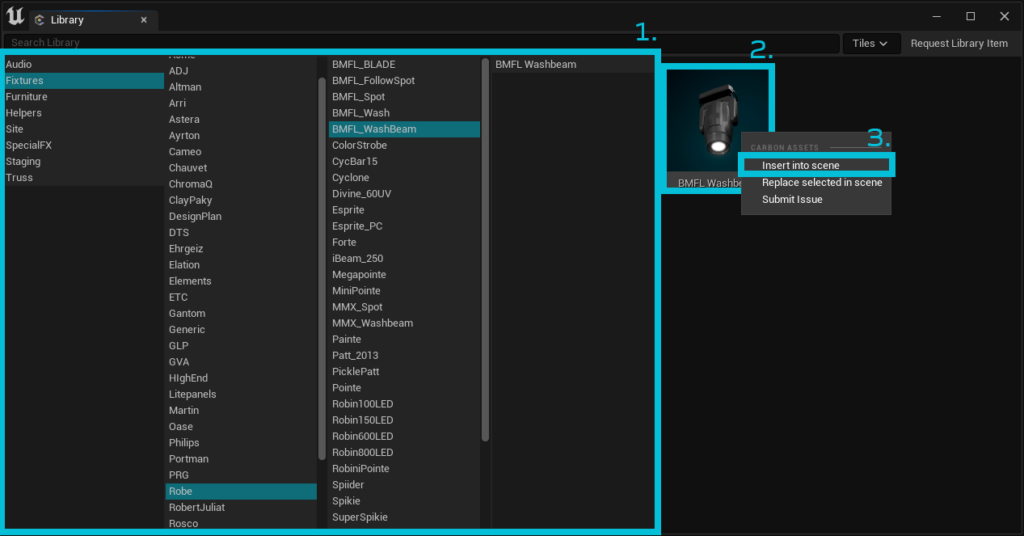
Once you have selected the fixture you wand to insert, right click on the thumbnail of the fixture and select “Insert into Scene (0, 0, 0)”. The fixture will be added to the scene and placed at the world space origin (x: 0, y: 0, z: 0). Keep in mind, depending on the layout of your scene, the origin may be in a place you don’t see immediately. (i.e. under the floor, inside another object) Once added to the scene, the fixture can be moved freely.
Alternatively, the fixture can be drag and dropped into the scene directly from the library panel.
All controllable fixtures in Carbon for Unreal have a patch that can be assigned to designate which Carbon Universe and channel it is assigned to for control. A patch is made up of a universe number and starting channel number separated by a period (.) (i.e. 2.117, Carbon Universe 2 starting at channel 117)
A fixture’s patch can be edited in one of several convenient ways:
- By selecting the fixture in the Unreal viewport, or World Outliner and changing the “Patch” field in the standard Unreal editor Details panel located in the “Patch Data” section.
- By using the Carbon Patch ponel interface.
- By using the Auto Patch tool.
Note: Fixture patches cannot be updated in Play mode.
Patching Fixtures
To begin patching, select a fixture in the scene, or open the Carbon Patch panel.
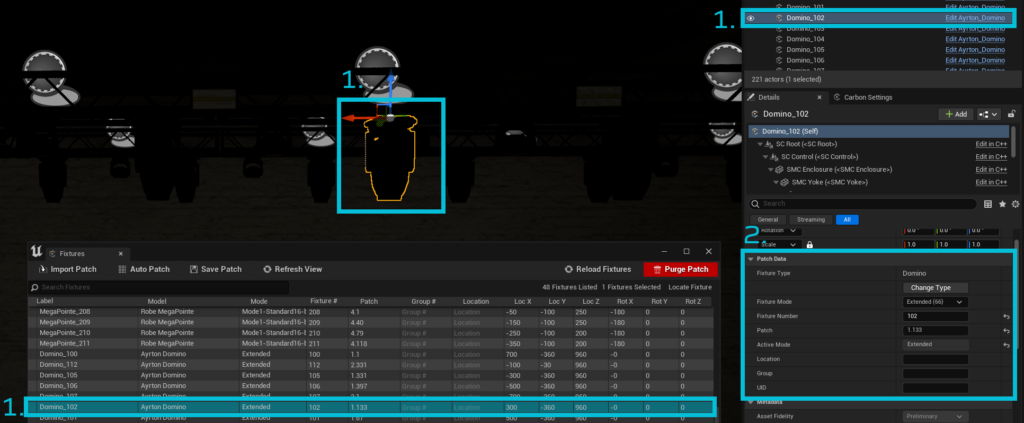
Find and select the fixture you would like to patch in the list. Once selected, navigate to the “Details” panel of the light and scroll down to “Fixture Data”. Here you can edit a variety of settings to individual fixtures. To set the mode, select the mode from the dropdown list. The Fixture number can be entered in the field directly below the active mode. To change the patch, simply enter the patch number within the “Patch” field of Fixture Data. (Universe.dmx format)
Auto Patching Fixtures
You can find more information about Auto Patching at this link.