Preparing your Data
Carbon is able to import entire show setups from a single spreadsheet. Carbon will begin reading data from the 2nd row and below on an import spreadsheet, so column headers can be any format you choose. To create this form, you may refer to the example spreadsheet displayed below. Carbon and Unreal use the metric system of measurement, so please import measurement values in meters.

(The spreadsheet above is one example of the format and fields you can use when importing to Carbon)
Import Patch
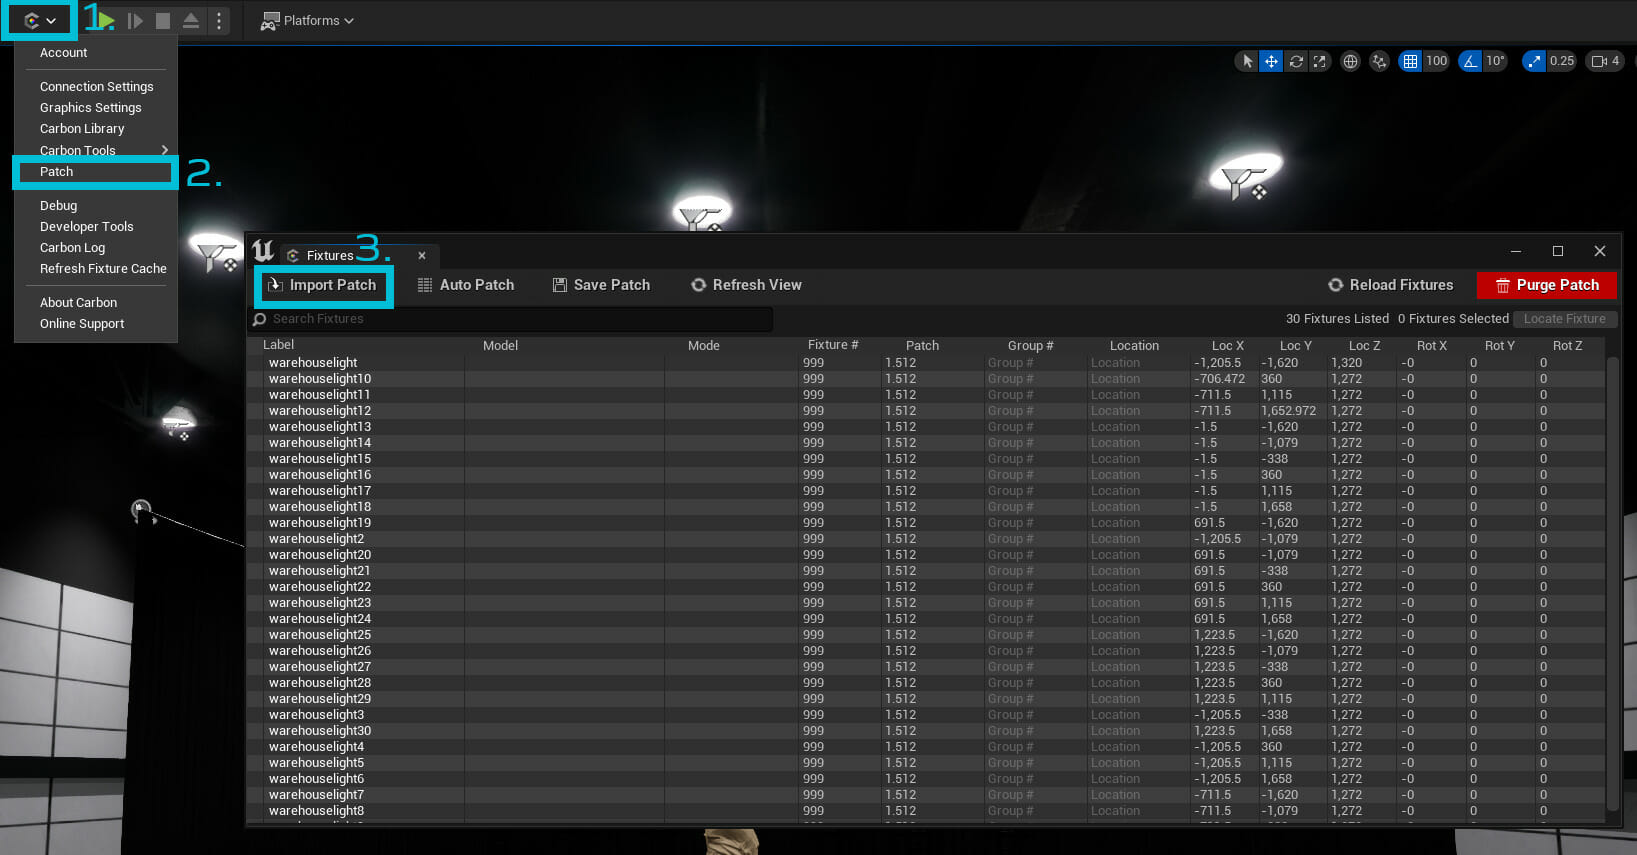
After creating/saving the csv file of fixtures, it can now be imported to Unreal through Carbon. In UE5, open the Patch Panel and select the “Import Patch” button.
A new “Import Patch” pop-up window will appear, select the “Select File” button at the top left of this window to access the file explorer. Find and open your csv file through this explorer window and click “Open”
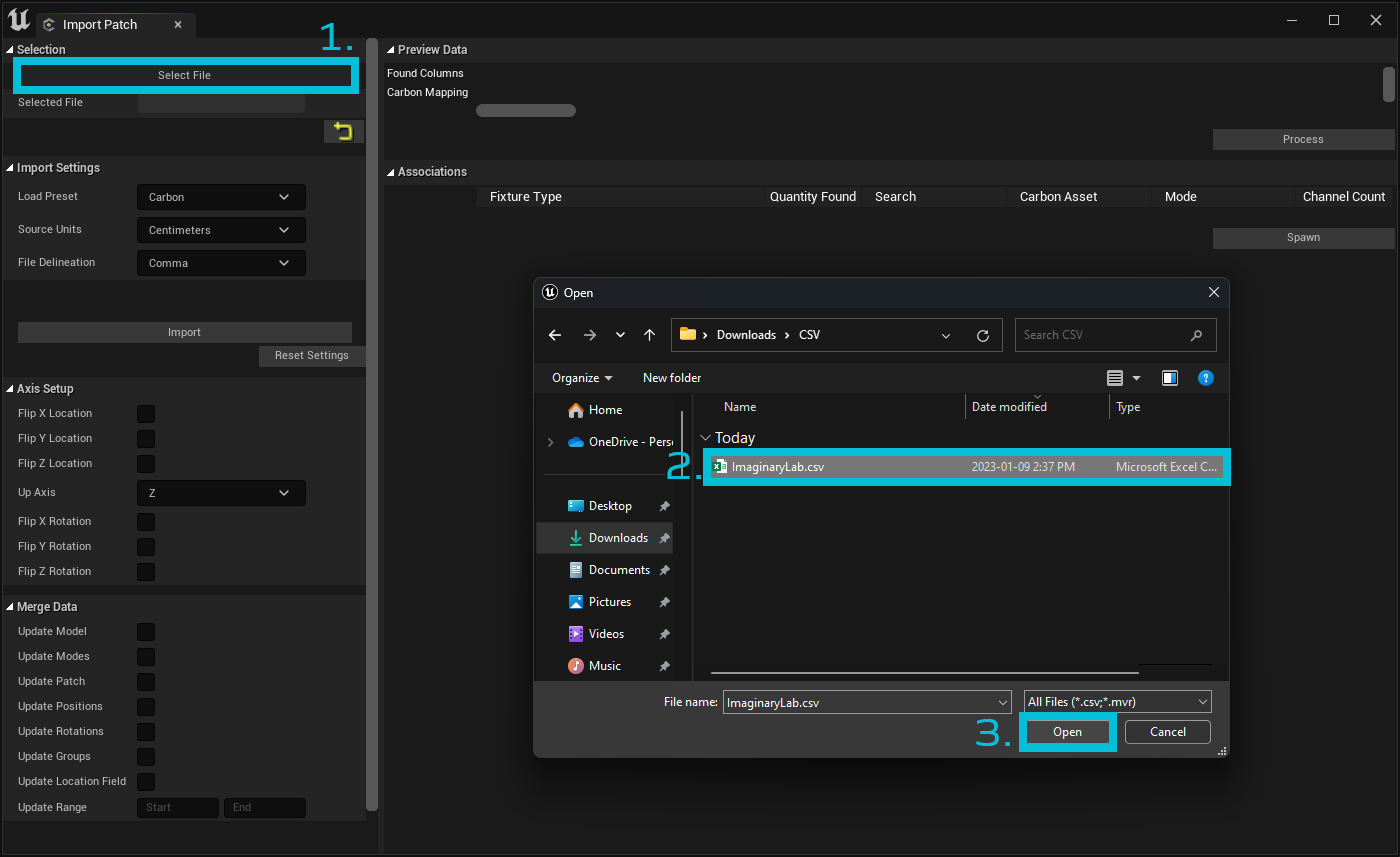
Selecting a .csv file to import into Carbon for Unreal
Import Settings
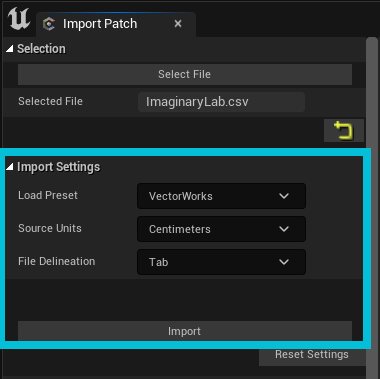
If the CSV was generated automatically from a supported preset, you can use the “Import Settings” to quickly map the column headers to the data values. Using the “Load Preset” dropdown, select the format the csv has been saved under and ensure the “Source Units” align with the default unit type of that preset. (Note: Carbon defaults to “Centimeter” units, while VectorWorks defaults to “Meter” units)
Once your import settings are selected, press the “Import” button.
Carbon will then parse the data into tables that can be used to generate fixtures within the scene.
Transforming Data
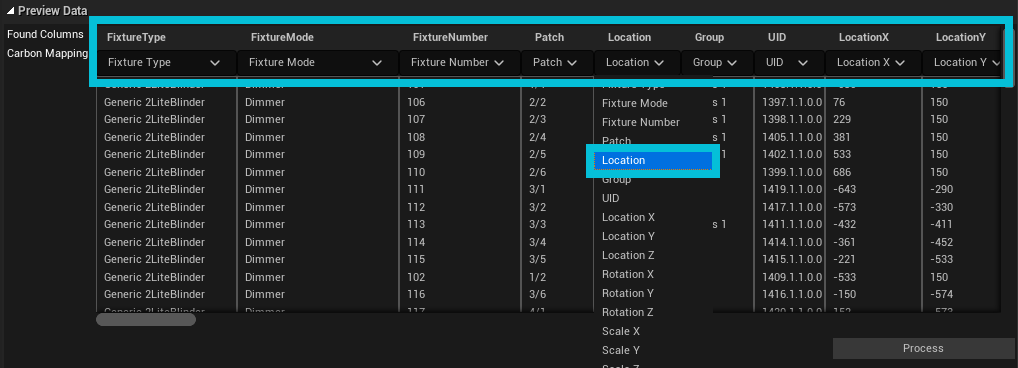
The imported data will now be transformed to Carbon compliant headers. After loading the file, all the Carbon Mappings should be automatically populated in the column headers. If any of the columns are misaligned with the CSV information, manually set the correct mapping using the dropdown menus.
Axis Setup
The “Axis Setup” section of the Import Patch tool allows you to swap and invert axis if needed. If the data was loaded from a supported preset, this data will be updated automatically and can often be left alone.

Associating with Carbon Assets
Once the mapped fields have been identified, select the “Process” button in the bottom right corner of the Preview Data section. This will generate fields and stats of the information Carbon has translated from the template. The section entitled “Associations” is where you can assign the fixture asset and mode to the different types of lights imported from the spreadsheet. With all the Associations populated with information, use the spawn button to generate the fixtures within your scene. Once you associate a fixture in this manner, it will be remembered as the default choice for future imports within the same unreal project.
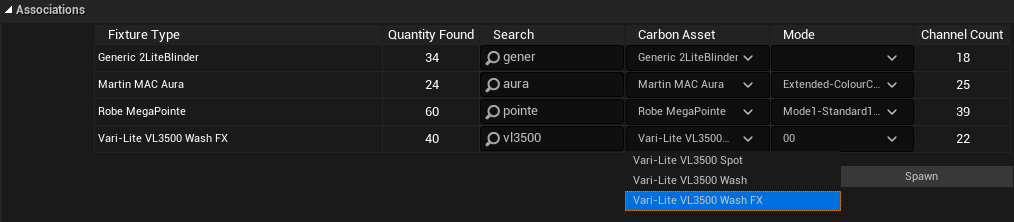
(Imported data associations are read from an imported spreadsheet that has been mapped and processed. The user can now tie mesh and mode associations with the fixtures generated.)
If successful, your fixtures should now be populated in the world at the coordinates listed on your csv document. You are now free to edit them however you wish.