Exploring the Library Panel
Carbon makes it easy to manually add new lights to a scene from a built-in library of fixtures. The library can be accessed via the Carbon Dropdown on the top of the Unreal Engine 5 interface. The first section on the left is the Miller Column file tree, and is a visual representation of the library sorting system. This file tree will allow you to narrow library assets down to a specific filter set based on the options you select in the columns. The right side of the library window houses the resulting fixture assets that the library contains.
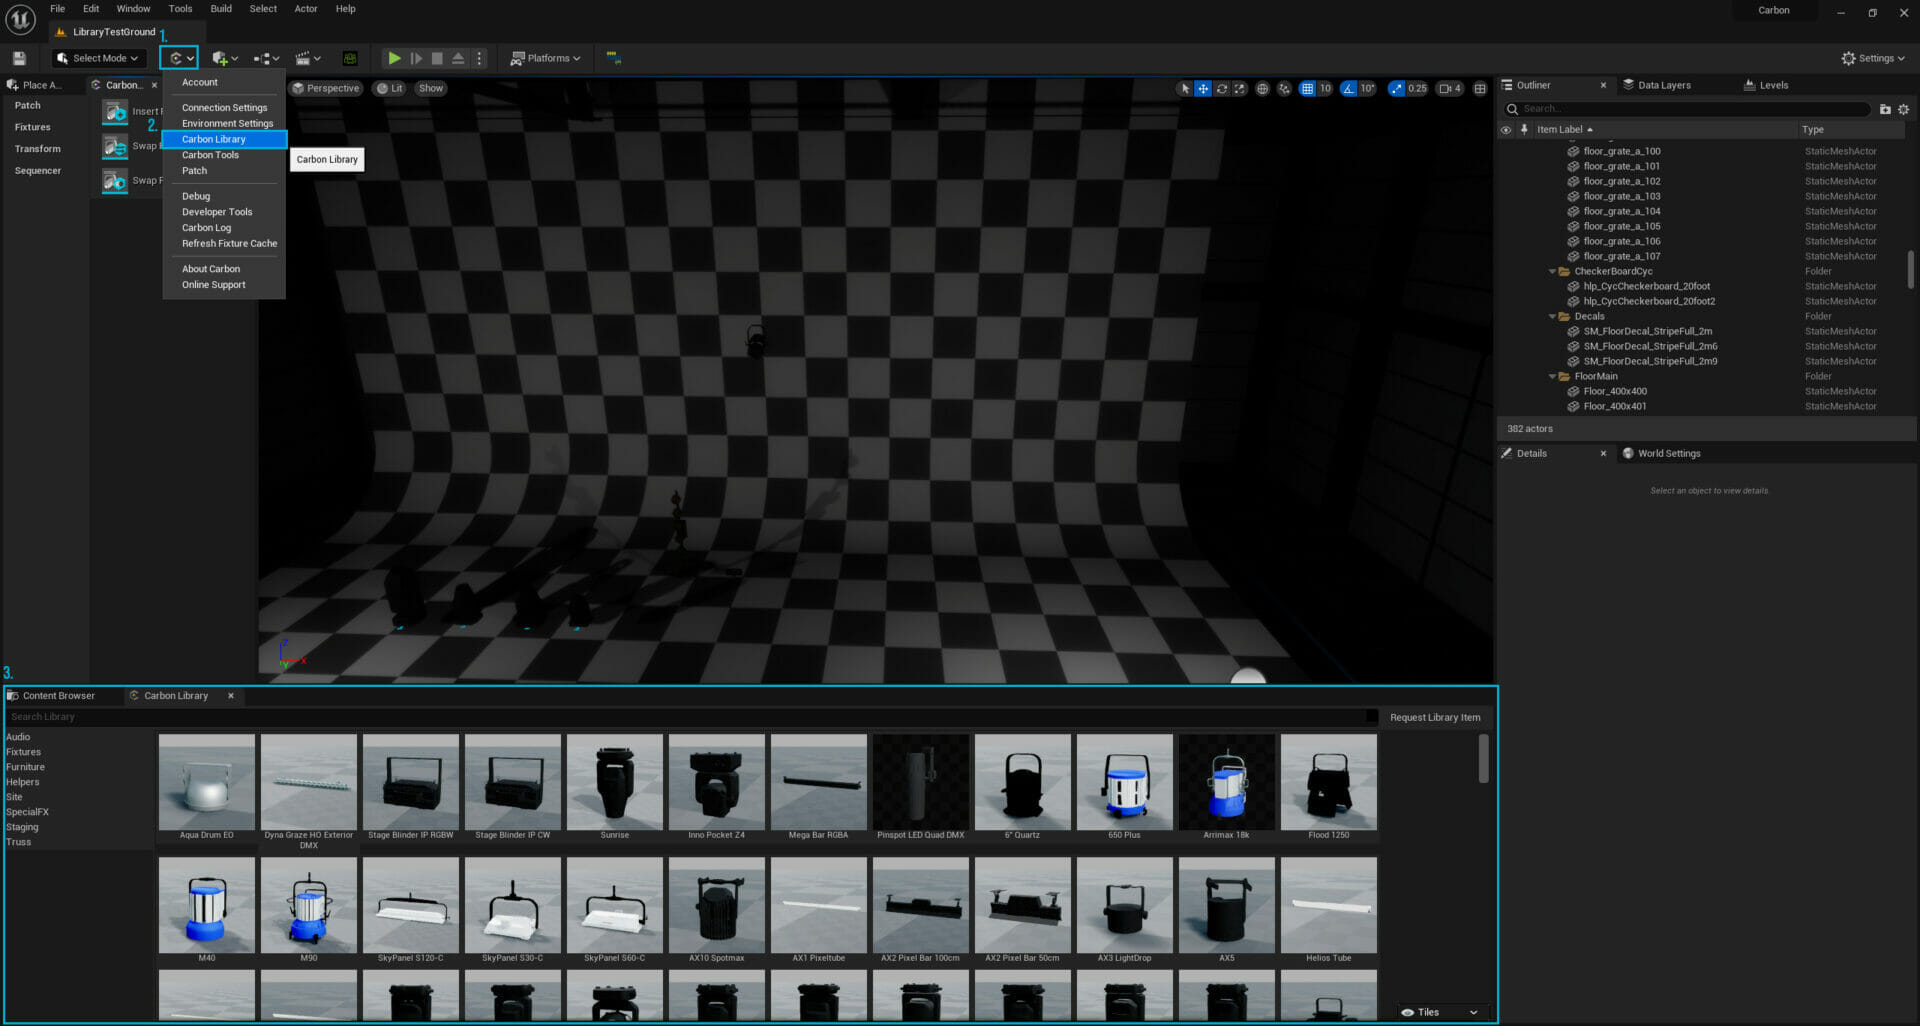
[The library panel shows a list of components (i.e. fixtures) you can manually add to your scene]
Adding a Fixture to Scene
To add a fixture, right click on the thumbnail of the fixture and select “Insert into Scene (0, 0, 0)”. The fixture will be added to the scene and placed at the world space origin (x: 0, y: 0, z: 0). Keep in mind, depending on the layout of your scene, the origin may be in a place you don’t see immediately. (i.e. under the floor, inside another object) Once added to the scene, the fixture can be moved freely.
TIP – Double click on a fixture in the World Outliner or press “F” with a fixture selected to zoom the viewport to the selected item.
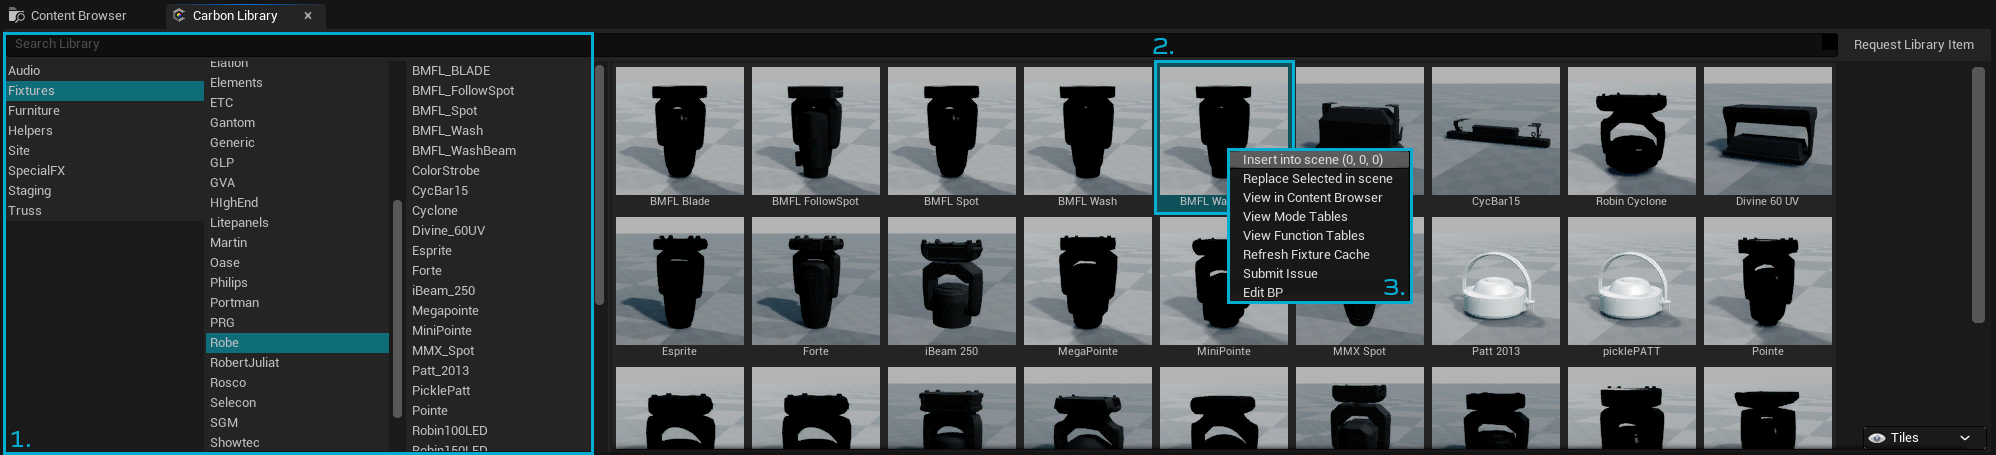
(By default the new fixture is added to the origin of the scene)
Requesting Library Assets
Carbon offers easy Library Requests with the Request Library Item button that allows you to submit requests to our developers. To do so, open the Carbon Library Panel. On the top-right of the Carbon Core Toolbar, you will see the button Request Library Item (See picture below). Clicking this will bring up our Request a New Library Asset page.
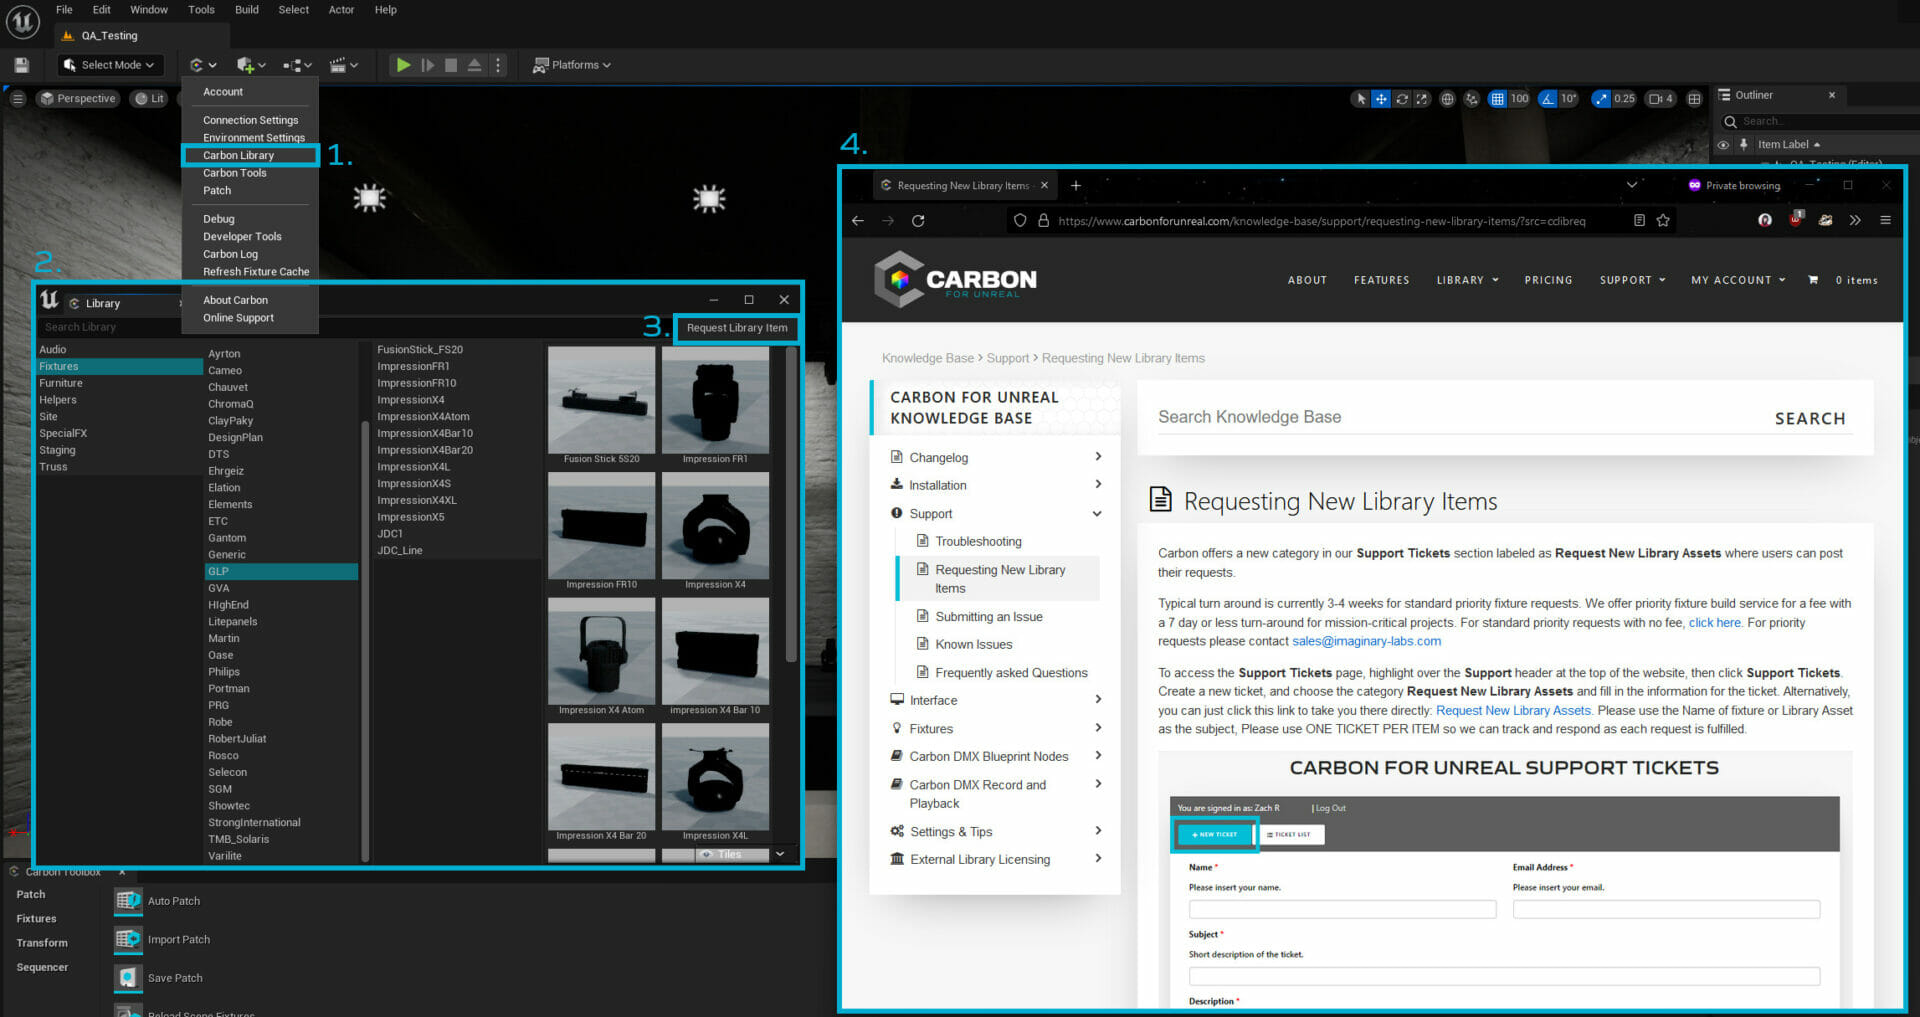
Alternatively, you can just visit the direct link to post your request here: Carbon for Unreal Forum Topic: Request a New Library Asset.